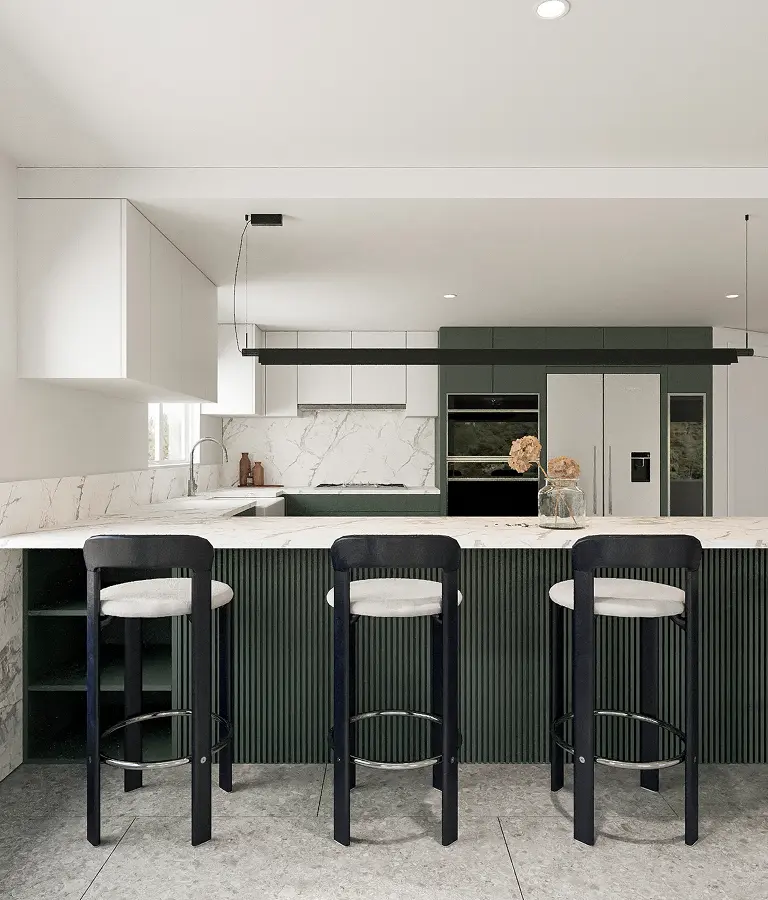
A home renovation in the Greater Seattle Area takes more than good ideas. It requires a clear plan, the right team and an understanding of how permitting, budgets and construction actually work in this market.
This guide walks you through 7 steps:
- Define your goals and scope
- Set a realistic budget — Seattle projects run $25,000–$300,000+ depending on scope
- Understand permits and timeline — major remodels take 6–12 months start to finish
- Hire a licensed, local contractor
- Finalize design and select materials
- Manage the construction phase
- Complete final inspections and punch list
At Maksymov Brownstone, we’ve worked on projects across the Greater Seattle Area — from kitchen remodels and bathroom upgrades to full-home transformations and additions. Each step below reflects what we work through on every project.
Step 1: Define your renovation goals and priorities
Every successful home remodeling process starts with a clear goal. Without one, decisions become harder, costs grow and the final result may not match your expectations.
Think about how you use your space today. Maybe your current layout feels tight, your kitchen doesn’t support how you cook and gather, or your bathrooms haven’t been touched since the house was built. Your lifestyle should shape your renovation plan — a growing family, remote work or hosting guests changes what you need from your home.
Timing matters too. Some homeowners start a renovation before a major life change, like welcoming a new child or preparing space for aging parents. Others renovate to increase resale value before listing. In Seattle, many homeowners aim for a balance — creating a space they enjoy now while building long-term equity.
Finally, decide which areas matter most. A kitchen remodel, updated bathroom, home addition or full renovation can all be the right choice depending on your priorities. Clear goals keep your renovation steps aligned with real needs — and help you avoid costly changes later.
Step 2: Set a realistic budget for your Seattle renovation
Renovation costs in the Greater Seattle Area run noticeably higher than national averages — and significantly higher than what most online calculators suggest. King County labor rates, local permit fees and the specific demands of older Pacific Northwest homes all push numbers up.
Typical project ranges in the Greater Seattle Area:
| Project type | Budget range |
| Powder room remodel | from $10,000 |
| Small bathroom remodel (up to 50 sq ft) | from $28,000 |
| Medium bathroom remodel (50–80 sq ft) | from $38,000 |
| Upscale bathroom remodel | $77,000–$97,000+ |
| Kitchen remodel — basic | $25,000–$35,000 |
| Kitchen remodel — mid-range | $35,000–$80,000 |
| Kitchen remodel — high-end / custom | $80,000–$150,000+ |
| Full house renovation | $150–$300+ per sq ft depending on scope |
| Primary suite addition | from $193,000 |
Budget items homeowners most often forget:
- Permit fees — Seattle permit costs are based on project valuation and reviewed by SDCI. King County increased permit fees by 49% in 2025 and by a further ~14% in 2026
- Electrical and plumbing upgrades — older Seattle-area homes built before 1980 frequently reveal knob-and-tube wiring, galvanized pipes or missing vapor barriers once walls open up
- Temporary housing or kitchen setup during major phases
- Material orders — custom cabinets, tile and specialty fixtures need to be ordered weeks before construction starts, not after
- Debris removal — dumpster rental and hauling after demolition

The 15–20% contingency rule
On any renovation in Seattle, budget an additional 15–20% on top of your contractor estimate for unexpected conditions. This buffer isn’t pessimism — it’s standard practice for anyone who has worked through enough Seattle projects to know what’s inside these walls.
Financing options most commonly used in this market: home equity line of credit (HELOC), cash-out refinance or a construction loan for larger scopes. Phasing the project — completing work in stages across 12–24 months — is another practical approach when the full budget isn’t available upfront.
Not sure what your project will realistically cost? Our team provides detailed line-item estimates from the first consultation — reach out to schedule one.
Step 3: Permits and timeline in the Greater Seattle Area
Permits are where most renovation timelines get derailed — not because of construction, but because homeowners don’t account for them early enough. In Seattle, the permitting process runs through SDCI and has its own logic that’s worth understanding before you set any expectations.
When do you need a permit?
Most work beyond cosmetic updates requires one. This includes anything involving structural changes, plumbing, electrical or changes to the building envelope. Minor updates — replacing fixtures, painting, flooring — typically don’t. When in doubt, check with SDCI or ask your contractor before starting.
How long does permitting take in Seattle?
| Project type | SDCI permit timeline |
| Simple / Subject-to-Field-Inspection (STFI) | 1–2 days |
| Standard remodel (kitchen, bathroom, addition) | 2–8 weeks |
| Complex projects (structural changes, ADUs, new construction) | 8–12 weeks |
One detail that catches homeowners off guard: before you can even submit drawings, you need an intake date — essentially a queue slot with SDCI. In busy periods that intake date alone can be 2–4 months out. This means the permit clock starts long before any paperwork is filed.
As of October 2025, the City set new permitting performance goals under the Mayor’s Executive Order aiming to cut total permitting time by 50% — progress is tracked publicly on SDCI’s Construction Permit Performance page.
What this means for your renovation schedule
A realistic timeline for a full kitchen or bathroom remodel in Seattle, from first contractor conversation to final inspection:
- Design and planning: 4–8 weeks
- Permit intake slot and submission: 2–8 weeks
- Permit review and approval: 2–8 weeks
- Construction: 6–12 weeks depending on scope
- Final inspections and punch list: 1–2 weeks
Total: typically 6–12 months from start to move-in for a major remodel. Homeowners who start the permit process before finalizing every design decision save the most time — your contractor can submit drawings while you’re still selecting finishes.
Permit processes also differ by municipality. Bellevue, Kirkland and Redmond each have their own review queues and code nuances. Working with a contractor who regularly pulls permits across King and Snohomish counties means fewer correction cycles and more predictable timelines.
Step 4: Hire the right contractor for your Seattle renovation
Choosing a contractor is the single decision that most affects how the rest of your home remodeling project goes — quality, timeline, budget and day-to-day stress all follow from it.
Verify license and insurance before anything else
In Washington State, all contractors must be licensed, bonded and insured. You can verify any contractor’s license through the Washington State Department of Labor & Industries contractor lookup. An unlicensed contractor may quote less upfront but creates real legal and financial risk — unpermitted work, no recourse if something goes wrong and potential issues at resale.
Before signing a contract, confirm:
- Active Washington State contractor license
- General liability insurance
- Workers’ compensation coverage
- Bond in place
Look for relevant local experience
A contractor who regularly works in Seattle, Bellevue or Kirkland understands how local building departments operate, what inspectors look for and which material suppliers have reliable lead times. Ask specifically about projects similar to yours and ask to see a portfolio with photos and references you can actually call.
Get itemized estimates, not ballpark numbers
A detailed line-item estimate shows you exactly what you’re paying for — labor, materials, subcontractors, permits — and gives you a real basis for comparing bids. Get at least two or three estimates. If one comes in dramatically lower than others, investigate before signing — not after.
Evaluate communication before you commit
How a contractor communicates during the estimate home remodeling process is how they’ll communicate during construction. A remodel is a months-long working relationship. The technical skills matter, but so does whether you’ll be kept informed when something unexpected happens — and something always does.
Understand the contract before signing
A solid contract includes: full scope of work, payment schedule tied to milestones, change order process, timeline with key milestones and warranty terms. Avoid contractors who ask for large upfront payments — in Washington State, a reasonable deposit is typically 10–15% of the project value.
Maksymov Brownstone works on projects across the Greater Seattle Area. We’re licensed, insured and our estimates are always itemized — view our portfolio or get in touch.
Step 5: Design and materials

Design decisions happen early but their consequences last for decades. The most common mistake Seattle homeowners make is treating this step as purely aesthetic — picking what looks good in a showroom without thinking about how it performs in this climate and this house.
Start with layout, not finishes
Before choosing tile or cabinet color, get the layout right. In a kitchen remodel, the relationship between the sink, stove and refrigerator determines how the space works every day. In a bathroom, the placement of the shower, vanity and door swing affects whether the room feels functional or cramped. Changes to layout after construction has started are expensive — finalizing the floor plan before touching a wall saves both money and friction.
Design for Seattle’s climate
The Pacific Northwest puts specific pressure on materials. Moisture, humidity and long dark seasons affect everything from flooring to paint:
- Flooring — engineered hardwood handles humidity swings better than solid hardwood; luxury vinyl plank (LVP) and tile are the most moisture-resistant options for kitchens, bathrooms and mudrooms. For a full breakdown by room and budget, see our flooring guide
- Cabinetry — cabinet construction quality determines how well doors and drawers hold up over years of use in a humid environment. The choice between stock, semi-custom and custom cabinetry is worth understanding before you budget — covered in detail in our guide Is custom cabinetry worth it?
- Countertops — quartz and granite both perform well under daily use; quartz is non-porous which makes it lower maintenance in a wet environment
- Paint and finishes — low-VOC paints are worth the small premium for indoor air quality, particularly in tighter Seattle homes where ventilation is limited in wet months
Avoid trends that age quickly
A renovation is a long-term investment. Highly specific trends — bold cabinet colors, novelty tile patterns, statement fixtures — can feel dated within five years. A neutral base with quality materials gives you flexibility to update through paint, hardware and accessories without touching the structure.
Coordinate material orders with your permit timeline
Custom cabinets typically take 6–12 weeks from order to delivery — tile, stone and specialty fixtures can be similar. Your contractor should be placing orders during the permit review phase, not after approval arrives. A team that sequences ordering alongside permitting keeps your project moving without gaps between permit approval and the start of construction.
Step 6: The construction phase
Once permits are approved and materials are on order, construction begins. Understanding the sequence helps you know where you are at any given point and what comes next.
The typical sequence of work
- Demolition — existing finishes, fixtures and sometimes walls come out. This is when hidden conditions get discovered — outdated wiring, water damage, missing insulation, undersized plumbing
- Rough framing — structural changes, new walls or openings
- Rough mechanical — plumbing, electrical and HVAC run through walls and ceilings before anything is closed up. This triggers the first round of inspections
- Insulation — especially important in older Seattle-area homes where original insulation is often inadequate
- Drywall — walls and ceilings are closed, taped and finished
- Finish work — flooring, tile, cabinets, countertops, fixtures, trim and paint. This is the longest phase and where the project visually transforms
- Final mechanical connections — appliances, plumbing fixtures, electrical fixtures and HVAC connected and tested
Typical construction timelines in Seattle
| Project type | Construction time (after permit approval) |
| Bathroom remodel | 3–6 weeks |
| Kitchen remodel | 6–12 weeks |
| Full house renovation | 4–9 months |
| Home addition | 4–6 months |
Living through construction
If you’re staying in the home, plan for it specifically. A kitchen remodel means no cooking for weeks — set up a temporary kitchen with a microwave, electric kettle and mini fridge in another room. Dust and noise are constant during demolition and framing; if anyone has respiratory sensitivities, staying elsewhere during demo is worth considering.
Schedule weekly check-ins with your project manager rather than daily visits. Any scope changes must go through a written change order before work proceeds — verbal agreements mid-construction are the most common source of budget surprises and disputes.
Step 7: Final inspections and punch list

The end of construction is not the end of the project. This step gets rushed more than any other — and it’s a mistake.
Final inspections in Seattle
Before any permitted work is complete, SDCI conducts final inspections to confirm the work matches the approved permit drawings and meets current code. A failed inspection means work stops until corrections are made and a re-inspection is scheduled.
What inspectors check at final:
- Electrical — panel work, outlets, GFCI placement, fixture connections
- Plumbing — supply lines, drain connections, fixture installations, water heater
- Mechanical — ventilation, HVAC connections, exhaust fans
- Structural — if any framing changes were made
- Energy code compliance — insulation, window performance, air sealing
The punch list
The punch list is a written record of every item that needs correction before final payment is released. Go through every room systematically — open every cabinet, run every faucet, test every switch and outlet. Do this in good daylight or with a flashlight. A well-run project typically has 10–20 punch list items; a list of 50+ signals inconsistent quality control during construction.
Before closing out, confirm you have:
- Copies of all permits with final inspection sign-off
- Warranty documentation from your contractor and subcontractors
- Appliance manuals and warranty cards
- Paint colors and material specs for future touch-ups
- As-built drawings if the layout changed from original plans
Release final payment only after the punch list is complete and SDCI has issued final inspection approval — not before.
Quick reference: common mistakes Seattle homeowners make

A summary of the decisions that consistently cause problems — whether you read every step or jumped straight here.
Starting construction before permits are approved. A stop-work order can mean demolishing completed work. In Seattle, SDCI takes unpermitted construction seriously. Wait for the permit.
Choosing a contractor on price alone. A bid that’s 30% below others usually means something is excluded or will surface as change orders mid-project. Investigate low bids before signing.
Ignoring the contingency budget. Seattle homes built before 1980 regularly reveal hidden problems once walls open. Budget 15–20% above your estimate — it’s not pessimism, it’s experience.
Changing scope mid-construction. Every change after demolition starts costs more than it would have in the planning phase. A simple wall relocation can trigger new framing, electrical rerouting and a permit revision. Decide before you demolish.
Skipping proper drawings to save on design fees. Without drawings, contractors bid inconsistently, permit submissions get rejected and field decisions are made without a reference point. The design phase is where mistakes cost paper, not concrete.
Releasing final payment before punch list is complete. Once the contractor is paid in full, the motivation to return for touch-ups drops sharply. Hold the final 10–15% until every item is resolved and you have inspection sign-off in hand.
Partner with Maksymov Brownstone for your Seattle home renovation
A successful renovation takes more than a good contractor — it takes a team that understands how homes in Seattle are built, how local permitting works and what materials perform in this climate over the long term.
Maksymov Brownstone works on kitchen remodels, bathroom renovations, home additions and full-home renovations across the Greater Seattle Area — from Seattle and Bellevue to Kirkland, Redmond, Bothell and beyond. We provide detailed estimates, clear timelines and consistent communication from first consultation to final inspection.
If you’re ready to move forward, contact our team to schedule a consultation and talk through your project.